


Why HEMP Stock Charts Tell a Different Story


Cannabis stocks move differently. Anyone who's tracked the sector knows this—wild swings on minimal news, volume spikes that seem to come from nowhere, and technical patterns that set up beautifully only to explode in unexpected directions. HEMP sits right in the middle of this chaos, and that's exactly what makes it worth studying. The stock has shown enough structure in its price action to reward pattern recognition, but enough volatility to keep things honest.
The Cannabis Sector's Technical Personality
The cannabis industry operates in a strange regulatory twilight zone, and that uncertainty bleeds directly into how these stocks trade. Federal legal limbo means sentiment can flip on a dime. A single headline about potential legislation sends the entire sector into a frenzy. Traditional fundamental analysis struggles here because the rules keep changing, but price action doesn't lie. The charts absorb all that confusion—the hope, the fear, the speculation—and turn it into readable patterns. Technical analysis becomes less about predicting the future and more about understanding what the current price structure is actually telling us.
What This Analysis Covers
In this breakdown of HEMP stock, we'll examine:
-
The key support and resistance zones currently defining the trading range
-
Trend structure and what moving averages reveal about directional bias
-
Chart patterns that have formed and their potential implications
-
Volume behavior and what it says about institutional vs. retail participation
-
Momentum indicators and whether they confirm or contradict price action
-
Realistic scenarios for the next major move, along with levels that would validate each path
Getting to Know HEMP: The Company Behind the Chart


Hemp Inc. (HEMP) operates in the industrial hemp sector, focusing on hemp-based products and cultivation. The company has positioned itself in multiple segments of the hemp supply chain, from growing operations to consumer goods. While the fundamental story has its complexities—like most early-stage cannabis and hemp plays—the stock's technical behavior is what keeps traders coming back. The ticker has developed a personality on the charts, with recognizable patterns and price memory at specific levels.
What Draws Technical Traders to HEMP
The stock exhibits the kind of volatility that makes pattern trading possible. HEMP stock tends to respect technical levels once they're established, creating actionable setups for swing traders. Volume comes in waves, often clustering around key support and resistance zones, which gives technical traders the fuel they need for entries and exits. The price action isn't random noise—there's structure here. When the stock breaks out or breaks down, it tends to follow through enough to reward properly positioned trades. That consistency in how it moves, even within an inconsistent sector, is what builds a following among chart watchers.
Market Cap and Liquidity Reality Check
Current trading characteristics worth knowing:
-
Market capitalization sits in the micro-cap range, which amplifies both opportunity and risk
-
Daily trading volume fluctuates significantly, with quiet days followed by high-volume bursts
-
Bid-ask spreads can widen during low-volume periods, affecting entry and exit precision
-
The stock trades OTC, which comes with its own set of quirks around order execution and price discovery
How Liquidity Affects Your Trading Approach
If you're planning to trade HEMP based on technical patterns:
-
Limit orders become more important than market orders to control fill prices
-
Position sizing needs to account for the reality that you might not get out instantly if the trade goes wrong
-
Patience pays off—waiting for volume to show up at your target entry often beats chasing
-
Pre-market and after-hours moves can be dramatic but thin, so the regular trading session provides more reliable price action
Setting Up Your Charts for HEMP Analysis


The timeframe you choose changes the story the chart tells you. For HEMP stock, the daily chart provides the tactical view—where you'll spot your entry and exit points, see intraday momentum shifts, and identify short-term patterns forming. The weekly chart gives you the strategic perspective, showing the bigger trend structure and major support/resistance zones that have held over months rather than days. Most successful traders use both, letting the weekly chart set their directional bias and the daily chart time their actual trades.
Recommended timeframe approach:
-
Weekly charts for identifying the dominant trend and major structural levels
-
Daily charts for pattern recognition and trade timing
-
Four-hour charts can bridge the gap when you need more granularity without getting lost in noise
-
Monthly charts occasionally, just to see if there are ancient levels from years back that might still matter
Why Volume Profile Matters More Here
Thinly traded stocks like HEMP don't move on fundamentals alone—they move when someone decides to actually buy or sell size. Volume profile shows you where the real trading has happened, not just where price touched. Those high-volume nodes represent price levels where shares changed hands in meaningful quantities, creating zones where supply and demand previously found equilibrium. When HEMP approaches these areas again, participants remember. Buyers who missed their chance before show up. Sellers who got stuck at higher prices finally see their exit. This memory effect makes volume profile one of the most reliable tools for identifying which support and resistance levels will actually hold versus which ones price will slice through like they were never there.
Price Levels That Have Proven Their Significance
Historical levels that continue to influence HEMP's price action:
-
Round number psychological levels where retail sentiment clusters and creates natural resistance
-
Previous consolidation zones where the stock traded sideways for extended periods, building up volume
-
Gap levels from sharp moves that left behind unfilled space on the chart
-
Old breakout points that often flip to become support once reclaimed, or resistance when lost
-
Multi-year highs and lows that represent the outer boundaries of what traders consider possible for this stock
Mapping Support and Resistance in HEMP


Support and resistance aren't mystical—they're just prices where enough traders decided to do something. When HEMP drops to a certain level and buyers consistently step in, that's support. When it rallies to a specific price and sellers show up with enough conviction to turn it back, that's resistance. The chart remembers these battles. Price tends to hesitate or react when it approaches these zones again, not because of magic, but because traders who acted there before are watching to see if history repeats.
Major support zones currently in play:
-
The recent swing low area where bounce attempts originated and volume spiked on the reversal
-
The 50-day moving average region when price is in an uptrend, acting as dynamic support
-
Previous resistance levels from months back that have now flipped to support after being convincingly broken
-
Round number prices where psychological buying interest tends to cluster
Resistance Levels Capping the Upside
Key resistance zones that have turned back rallies:
-
The most recent swing high where sellers overwhelmed buyers and momentum died
-
Gap-fill levels from previous sharp moves down, where overhead supply often waits
-
Prior consolidation highs where the stock previously churned before breaking lower
-
The 200-day moving average when price is in a downtrend, acting as dynamic resistance
-
Volume profile peaks showing prices where heavy trading occurred and many traders got positioned
How Ranges Form Between These Levels
When support holds and resistance rejects, you get a range. HEMP stock has shown a tendency to establish these boxes on the chart where price oscillates between defined boundaries. Traders who recognize the range early can play the edges—buying near support with stops just below, selling near resistance with targets just underneath. The range persists until something changes: either buyers finally overwhelm the resistance with enough volume and momentum to break through, or sellers crack the support and trigger a flush to the next level down.
The best trading ranges have clear boundaries, decent width between support and resistance to make the risk-reward worthwhile, and multiple touches on both sides that confirm the levels are real.
Reading the Directional Bias in HEMP


Trend is your friend until it isn't, and knowing which phase HEMP stock is currently in makes the difference between trading with the flow or fighting against it. An uptrend means higher highs and higher lows—each pullback finds support above the previous one, and each rally pushes beyond the last peak. A downtrend is the opposite, with lower lows and lower highs grinding the price down in a stair-step pattern. Consolidation is when price goes sideways, coiling up energy while traders figure out what comes next. Right now, identifying which of these three states HEMP occupies tells you whether to look for long setups, short opportunities, or just wait for clarity.
Signs that reveal the current trend state:
-
The sequence of swing highs and swing lows over the past several weeks
-
Whether price is generally trading above or below the key moving averages
-
The slope and direction of the moving averages themselves—rising, falling, or flattening
-
The character of rallies versus pullbacks—which ones show conviction and which ones feel forced
Moving Averages as Trend Guides
The three moving averages that matter most for HEMP:
-
The 20-day MA captures short-term momentum and often acts as the first line of support in healthy uptrends
-
The 50-day MA represents intermediate-term trend and tends to hold during pullbacks in established moves
-
The 200-day MA is the long-term trend barometer—price above it suggests bulls have the edge, price below it favors bears
-
The relationship between these averages tells its own story: when the 20 crosses above the 50, and both sit above the 200, that's textbook bullish alignment
-
When moving averages tangle together in a knot, it usually means the stock is going nowhere fast
What Trendline Breaks Actually Mean
How to interpret when HEMP breaks a trendline:
-
A trendline drawn under rising lows in an uptrend acts as visual support—breaking it suggests the upward momentum is fading
-
The break itself isn't always the signal; what happens after matters more—does price immediately recover, or does it accelerate lower?
-
False breaks happen constantly, which is why waiting for a close below the trendline, not just an intraday violation, filters out noise
-
Volume on the break adds conviction—a breakdown on heavy selling volume means more than one on light turnover
-
When a trendline gets tested multiple times before breaking, that break tends to carry more follow-through
Remember: HEMP can shift from trending to consolidating to trending again faster than most stocks due to sector volatility, so staying flexible beats getting married to a directional bias.
Pattern Recognition in HEMP's Price Action


Classic chart patterns show up in HEMP just like they do everywhere else, but they play out with more drama. The structure is there—triangles, head and shoulders formations, double tops and bottoms—but the execution often comes with extra volatility attached. A pattern that would take three months to complete in a blue-chip stock might form in three weeks here. The proportions stay the same, just compressed in time and amplified in movement. Spotting these patterns early gives you a roadmap for where price might go next and, just as importantly, at what point the pattern fails and you need to bail.
Common patterns that have appeared in HEMP's chart history:
-
Ascending and descending triangles as the stock coils up before breaking out of consolidation
-
Head and shoulders patterns at major turning points, signaling potential trend reversals
-
Double tops and bottoms at support and resistance zones, showing where price rejected twice before giving in
-
Bull and bear flags during strong trends, representing brief pauses before the next leg
-
Cup and handle formations during recovery phases after significant selloffs
Pattern Reliability in Cannabis Names
How HEMP stock patterns differ from traditional sectors:
-
Patterns complete faster due to heightened volatility, which means less time to position but quicker payoffs
-
False breakouts happen more frequently because the sector attracts momentum chasers who pile in and out quickly
-
The measured move targets from patterns often get exceeded on the upside and downside—cannabis stocks overshoot
-
News can override technical patterns mid-formation, causing patterns to abort before completion
-
Volume confirmation becomes even more critical because thin trading can create pattern-like shapes that aren't real accumulation or distribution
Calculating Price Targets from Completed Patterns
When a pattern completes and price breaks out, the pattern itself gives you a target. For a head and shoulders, you measure the distance from the head to the neckline, then project that same distance from the breakdown point. For a triangle, you take the height at the widest part and add it to the breakout level for upside moves or subtract it for breakdowns. These aren't guarantees—they're probabilities based on what similar patterns have done historically. HEMP tends to hit these measured targets more often than not, though sometimes it takes a scenic route to get there.
Pro tips for trading pattern breakouts in HEMP: Wait for the close beyond the pattern boundary rather than trading intraday breaks. Use the pattern's opposite boundary as your stop-loss level—if a triangle breaks up, a move back into the triangle means the pattern failed. Scale out as price approaches the measured target rather than waiting for perfection. And always check if the pattern aligns with the bigger trend—patterns that break in the direction of the dominant trend have higher success rates than counter-trend patterns.
Understanding Volume Behavior in HEMP


Volume tells you whether anyone actually cares about a price move. HEMP can swing five or ten percent on a given day, but if it happens on thin volume, that move is fragile—likely to reverse once real participation shows up. When volume spikes, something changed. Maybe news hit, maybe a large holder decided to exit, or maybe new buyers finally found conviction. The chart shows you what happened with price; volume shows you how much force was behind it. Matching the two together reveals whether moves have legs or are just noise that will fade by next week.
Recent volume spikes in HEMP and their catalysts:
-
Sector-wide rallies driven by cannabis legislation headlines that lifted all boats simultaneously
-
Earnings announcements or company-specific news that brought in short-term speculators
-
Technical breakouts above resistance where momentum traders piled in after the initial move
-
Panic selling on down days when support broke and stops got triggered in cascade
-
Social media or retail trader attention that created temporary volume surges without fundamental backing
Volume Confirmation on Price Moves
Price going up on increasing volume? That's healthy. It means buyers are willing to pay higher prices and more participants are getting involved. When HEMP stock rallies but volume actually shrinks as the move progresses, that's a warning sign. The move is running out of fuel. Smart money may already be fading the rally, letting retail chase the top. The same logic applies in reverse—breakdowns on expanding volume have follow-through, while price drops on weak volume often get bought back quickly. The best trades happen when price and volume align: strong moves happening on strong participation.
Momentum Indicators: What the Math Says About HEMP

Momentum indicators strip away the noise and show you whether buyers or sellers have the upper hand right now. These tools—RSI, MACD, and others—measure the rate of change in price, not just the direction. A stock can be trending up but losing momentum, which shows up in the indicators before it shows up in price. For HEMP stock, these measurements matter because the volatility can mask underlying shifts in conviction. The indicators give you a second opinion, confirming what price is doing or flashing warnings when something doesn't line up.
Key momentum concepts for HEMP analysis:
-
Momentum peaks and troughs often lead price peaks and troughs by days or weeks
-
Extreme readings in either direction suggest an unsustainable pace that needs correction
-
Divergences between price and momentum frequently signal reversals before they happen
-
Crossovers and centerline breaks provide specific entry and exit signals
-
Multiple indicators confirming the same message carries more weight than a single signal
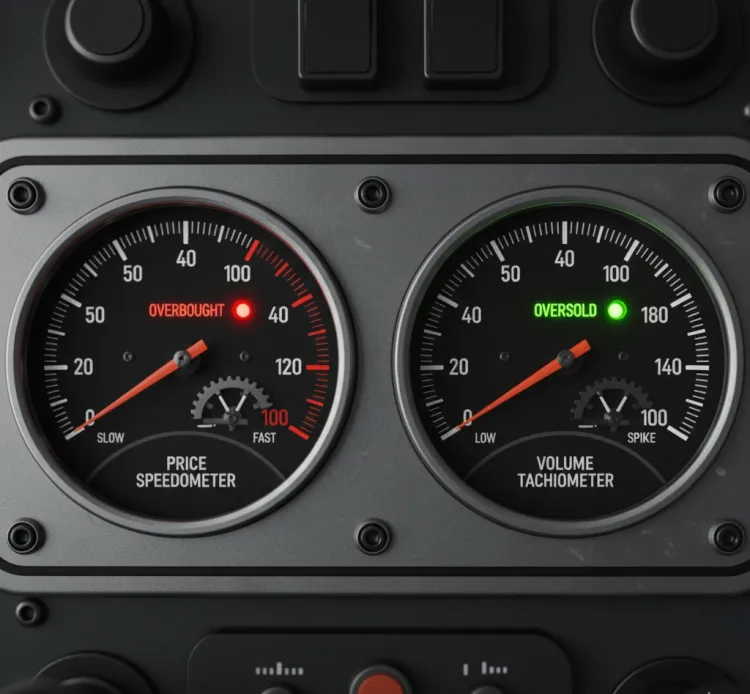
RSI: Overbought, Oversold, and Divergences
How to read RSI in HEMP's current position:
-
Readings above 70 suggest overbought conditions where the rally may be extended and vulnerable to pullback
-
Readings below 30 indicate oversold conditions where selling pressure may be exhausted and a bounce could be near
-
The 50 level acts as a centerline—holding above it confirms bullish momentum, falling below it suggests bearish control
-
Bullish divergence happens when price makes a lower low but RSI makes a higher low, showing weakening selling pressure
-
Bearish divergence occurs when price makes a higher high but RSI makes a lower high, revealing fading buying momentum
-
In strong trends, RSI can stay overbought or oversold for extended periods, so extreme readings alone aren't always reversal signals
MACD: Signal Line Crosses and Histogram Behavior
What MACD reveals about HEMP's momentum:
-
Bullish crossover occurs when the MACD line crosses above the signal line, suggesting upward momentum building
-
Bearish crossover happens when the MACD line crosses below the signal line, indicating downward momentum taking hold
-
The histogram measures the distance between MACD and signal line—expanding bars show accelerating momentum, shrinking bars show deceleration
-
Centerline crosses (zero line) confirm trend changes—crossing above zero is bullish, below is bearish
-
MACD divergences work like RSI divergences, warning of potential reversals when price and indicator disagree
Reading the Momentum Tea Leaves
HEMP's momentum indicators right now paint a picture of where the energy is flowing. When both RSI and MACD align—both bullish or both bearish—the probability of follow-through increases. When they contradict each other, caution makes sense. The best setups happen when momentum confirms what price structure already suggests. If resistance is nearby and momentum is rolling over, that's a high-probability short setup. If support is holding and momentum is building, longs make sense.
IF RSI shows bullish divergence at support while MACD crosses bullish, THEN the odds favor a bounce worth trading.
IF RSI hits overbought at resistance while MACD histogram shrinks, THEN the rally is likely running out of steam.
IF momentum indicators stay neutral while price chops sideways, THEN waiting beats forcing trades.
IF both indicators surge in the same direction with expanding histogram and rising RSI, THEN the trend has conviction and fading it is dangerous.
The Reality of Risk in Cannabis Stocks


Cannabis stocks don't play by the same rules as stable, boring companies. The sector carries inherent wildness that affects every technical setup, no matter how clean it looks on the chart. HEMP stock operates in this environment, which means your risk management needs to account for moves that would be considered outliers in other sectors but are just Tuesday afternoon here. Understanding these risks doesn't mean avoiding the trade—it means sizing appropriately and setting expectations that match reality rather than wishful thinking.
Sector-specific volatility factors to account for:
-
Regulatory headlines can move the entire cannabis sector violently in either direction within minutes
-
Federal legal status remains uncertain, creating binary risk events around legislation votes or policy announcements
-
Banking and financing challenges mean companies face operational hurdles that can surface unexpectedly
-
Short-term trader dominance in the sector leads to momentum swings that overshoot reasonable valuations
-
Correlation within cannabis stocks means sector-wide selloffs can overwhelm individual stock technicals
-
Thin analyst coverage and limited institutional ownership reduce price stability
Gap Risk and After-Hours Chaos
Gaps happen when HEMP closes at one price and opens significantly higher or lower the next session. Sometimes you go to bed with a profitable position and wake up to find it gapped through your stop-loss, leaving you with a much larger loss than planned. Or the stock gaps up past your target, and you missed the best part of the move. Cannabis stocks gap more frequently than most sectors because news doesn't wait for market hours. A bill gets introduced at 8 PM, and by 9:30 AM the next day, HEMP has already moved 15%. Your technical setup might have been perfect, but gaps don't care about support levels or trendlines. You can't eliminate gap risk, but you can acknowledge it exists and reduce your position size accordingly.
Position Sizing: How Much Is Too Much
The math changes when volatility runs this hot:
-
A position that would be reasonable in a large-cap stock becomes reckless in HEMP due to potential overnight moves
-
Risk per trade should be smaller in percentage terms to account for the possibility of gaps through stops
-
Using a fraction of your normal position size allows you to withstand the wider stop-losses often needed in volatile stocks
-
If your stop-loss needs to be 20% away to give the trade room to breathe, your position size should reflect that reality
-
Concentrating too much capital in one cannabis play means one bad gap can damage your account significantly
The bottom line: Technical analysis works in HEMP, but the execution requires humility about what can go wrong. Cut your position sizes, widen your stops to account for noise, accept that gaps will occasionally wreck even good setups, and never risk more than you can afford to lose on any single cannabis trade—because the sector will eventually test your risk management, and when it does, you want to survive to trade another day.
Paths Forward for HEMP


The future isn't written, but the chart shows you what needs to happen for each scenario to play out. HEMP stock sits at a decision point where bulls, bears, and the undecided are all waiting for confirmation. Technical analysis doesn't predict which path wins—it identifies what signals would validate each outcome. You watch for these triggers, and when one fires, you align your trading with that reality instead of fighting it. Having a plan for all three scenarios keeps you flexible rather than married to one outcome.
What to watch as HEMP approaches the next move:
-
Whether price respects current support and resistance or violates them decisively
-
If volume confirms directional moves or shows up weak and unconvincing
-
How momentum indicators respond at critical price levels
-
Whether moving averages align to support a trend or remain tangled in indecision
-
The behavior of the broader cannabis sector and whether HEMP moves with or against its peers
The Bull Case: Technical Triggers for Upside
For HEMP to confirm a bullish scenario, these conditions need to materialize:
-
Price breaks cleanly above the current resistance zone with expanding volume showing real demand
-
A daily close above key moving averages, particularly the 50-day and 200-day if currently below them
-
RSI pushes into bullish territory above 50 and holds there, showing sustained momentum
-
MACD generates a bullish crossover with the histogram expanding positively
-
Higher lows form on pullbacks, creating an uptrend structure that holds each support test
-
Volume increases on up days and decreases on down days, confirming accumulation
-
The measured move target from any completed bullish pattern remains achievable without obvious overhead resistance
The Bear Case: Confirming the Downside
Technical signals that would validate continued weakness in HEMP:
-
A breakdown below current support with heavy volume indicating urgent selling pressure
-
Failure to reclaim moving averages after rallies, with price getting rejected at the 20-day or 50-day MA
-
RSI rolling over from overbought conditions or breaking below 50 and trending lower
-
MACD generating a bearish crossover with the histogram expanding negatively
-
Lower highs forming on bounces, creating a downtrend structure where each rally fails below the previous one
-
Distribution patterns showing up in volume, with selling pressure outweighing buying interest
-
The measured move target from a bearish pattern pointing to significant downside with clear support levels far below
The Range-Bound Reality
Sometimes the most honest read on a chart is admitting that nothing decisive is happening yet. HEMP could easily chop sideways between established support and resistance for weeks, frustrating both bulls and bears while rewarding range traders. In this scenario, price oscillates within defined boundaries, testing both edges but failing to break either with conviction. Volume stays moderate, momentum indicators hover near neutral centerlines, and moving averages flatten out.
The stock isn't building energy for a breakout—it's just trading, back and forth, until something fundamental or technical shifts the equilibrium. Range-bound periods aren't failures of analysis; they're periods of indecision where the market hasn't chosen a direction yet. The smart play here isn't forcing directional trades but either playing the range edges or waiting for a confirmed break before committing to a trend trade.
Building a Trading Plan Around HEMP's Technicals


Having a view on where HEMP stock might go means nothing without a plan for how you'll actually trade it. Entry and exit points, stop placement, position sizing—these details separate traders who make money from those who just have opinions. The technical picture gives you the framework, but you still need to decide where you're getting in, where you're getting out if you're wrong, and where you're taking profits if you're right. These decisions should come from the chart structure, not from hope or fear or whatever your account balance makes you feel like doing.
Core principles for trading HEMP based on technicals:
-
Enter near support when playing the long side, giving yourself the best risk-reward from the start
-
Wait for confirmation of a breakout rather than anticipating it—let price prove the level is broken before committing
-
Use multiple time frames to refine entries—weekly for direction, daily for timing, hourly for precision if needed
-
Scale into positions as the trade confirms rather than going all-in at once
-
Define your exit plan before you enter, both for wins and losses
Stop-Loss Placement Using Chart Structure
Your stop-loss should go where the chart tells you the trade idea is wrong, not where your emotions can handle the loss. If you're buying at support, the stop goes below that support zone—because if support breaks, your reason for being long just failed. If you're shorting at resistance, the stop sits above that resistance—because a break higher invalidates the setup. HEMP's volatility means stops need breathing room to avoid getting shaken out by normal noise, but they also can't be so wide that a loss wrecks your account.
Pro tip for stop placement in volatile cannabis stocks: Place stops beyond the structure, not right at it—give the level a chance to hold without your stop sitting exactly where everyone else's sits.
Risk-Reward Ratios That Make Sense
Evaluating whether a HEMP trade setup is worth taking:
-
Target at least 2:1 reward-to-risk ratio as a minimum threshold—risking $1 to make $2 or better
-
In highly volatile stocks like HEMP, aiming for 3:1 or higher accounts for the extra uncertainty and gap risk
-
Use the chart's structure to set targets—previous swing highs for longs, previous swing lows for shorts, or measured move targets from patterns
-
If the distance to your target relative to your stop doesn't offer adequate reward, skip the trade regardless of how good the setup looks
-
Be realistic about whether your target is achievable given overhead resistance or underlying support
-
Scale out at multiple targets rather than holding for one perfect exit—take some profit at 2:1, let some run for 3:1 or more
-
When risk-reward looks poor because stops need to be wide, reduce position size instead of taking an inadequate ratio
Putting It All Together: The HEMP Technical Road Map


HEMP stock presents a technical picture that rewards patience and discipline while punishing recklessness and wishful thinking. The chart shows structure—identifiable support and resistance zones, recognizable patterns, momentum signals that align or diverge in meaningful ways. The volatility is real, the gaps happen, and the sector-specific risks don't disappear just because your technical setup looks clean. But that's the trade-off. Higher risk, higher reward, and a chart that actually responds to technical levels when you read it correctly. The traders who succeed here are the ones who respect both the opportunity and the danger, who size positions appropriately, and who take what the market gives them instead of forcing what they want it to give.
Levels That Matter Moving Forward
Watch these technical markers as HEMP develops:
-
The current support zone where buyers have stepped in repeatedly—a break below invalidates bullish setups
-
Near-term resistance that has capped rallies and needs to be cleared with volume for continuation higher
-
The 50-day and 200-day moving averages as dynamic support or resistance depending on trend direction
-
Volume profile nodes showing price levels with historical high activity that will likely matter again
-
Any trendlines connecting recent swing lows or swing highs that define the current directional bias
-
Pattern targets from completed formations that provide objective price objectives
-
Key round numbers where psychological buying or selling tends to cluster
The Cannabis Stock Technical Trading Mindset
Technical analysis works in cannabis stocks, but it works differently. The patterns form faster, break more violently, and overshoot more frequently than in traditional sectors. HEMP stock follows these rules. Your edge comes from recognizing that the principles stay the same—support holds until it doesn't, momentum precedes price, volume confirms moves—but the execution requires adjustments.
Wider stops, smaller positions, quicker decisions, and a willingness to be wrong and move on. The chart will tell you what's happening if you're listening. It won't tell you what's going to happen with certainty, but it will show you the scenarios, the triggers, and the levels that matter. Your job is to trade what you see, not what you hope for, and to survive the inevitable chaos long enough to catch the moves that actually work.
